setwd("C:/Users/veronica.codoni/Projects/Survival_Analysis")Setting up your work environment
Development tools, version control, packages
Monday, 16 September 2024
Learning objectives
![]()
![]()
![]()
What is RStudio?
RStudio is an Integrated Development Environment.
![]()
Install R first
RStudio and R are independent.
Features
- Projects to ease files organisation
- Console to run R, with syntax highlighter
- full support for Rmarkdown docs & chunks
- Viewer for data / plots / website
- Package management (including building, tests and development)
- Autocompletion using TAB
- Cheatsheets
- Git integration for versioning
- Inline outputs
- Keyboard shortcuts
- integrated Terminal
- Jobs for running long runs in a separated session
The four panels layout

Better reproducibility
Environments should not be saved
rm(list = ls()) is not recommended
- does not make a fresh R session
library()calls remain- working directory not set!
- modified functions, evil
==<-!=
- Knitting
Rmarkdownfiles solves it- Always run in a fresh session
- Workflows like
targetsallow to be fast and fully reproducible
Options to activate / deactivate
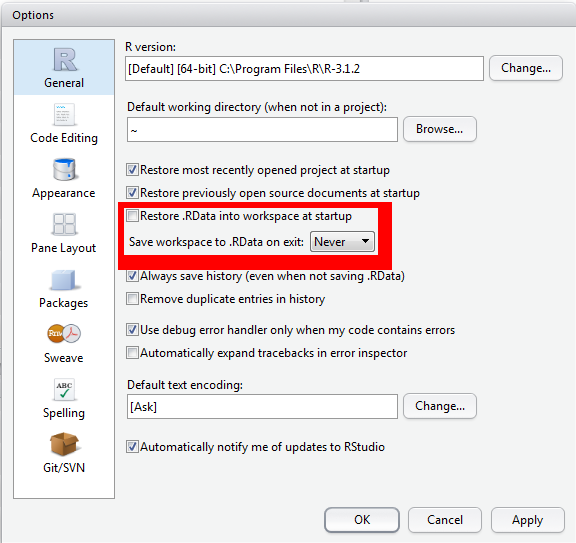
Warning
Please save all environments except for the R session
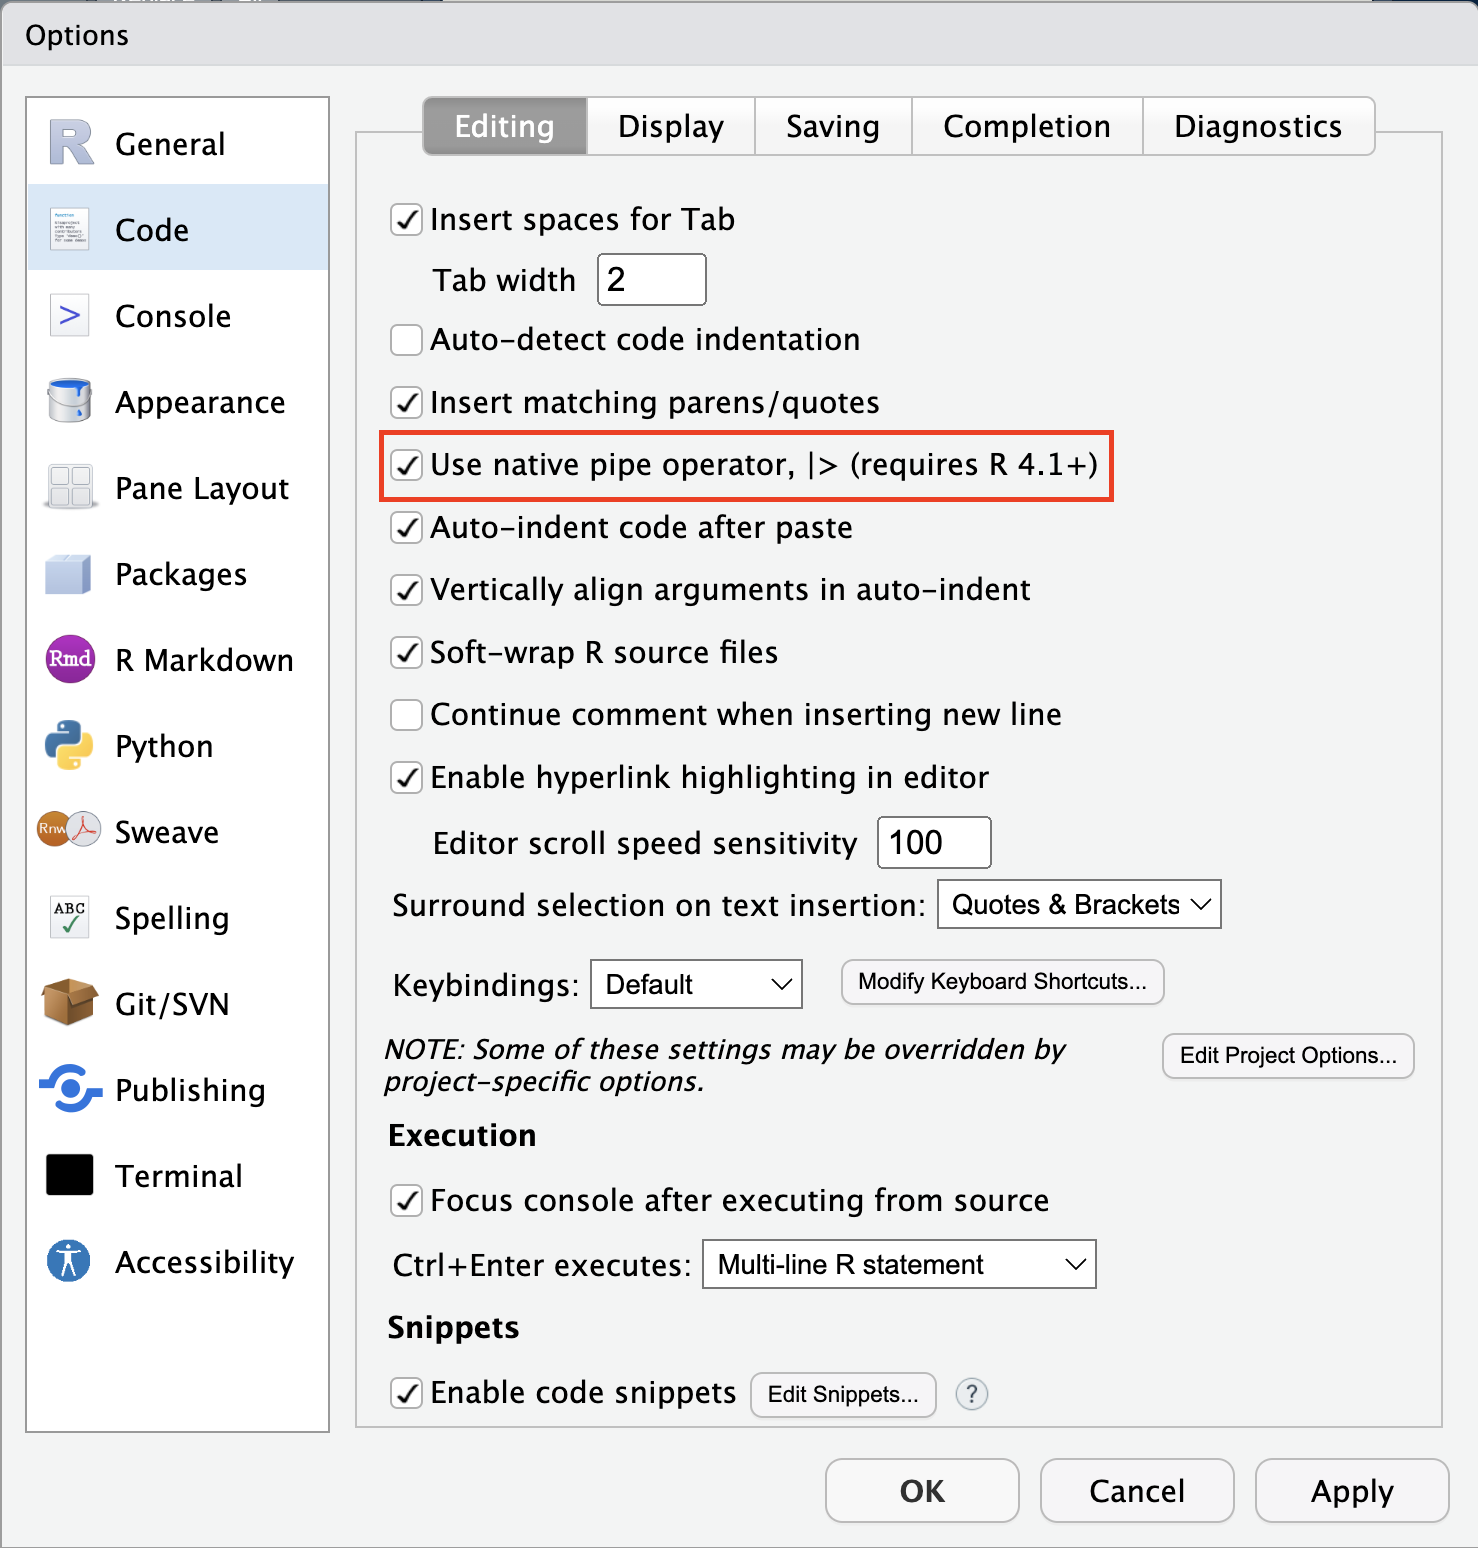
Other settings of note
Base pipe with Ctrl/⌘-Shift-M
Additional code diagnostics
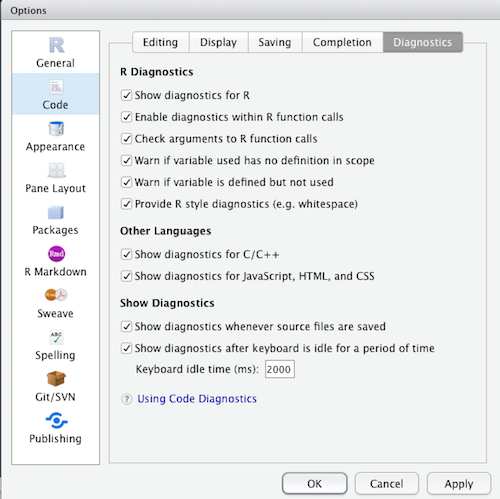
Consider at your own risk
Creates many warnings if all options are selected, particular with tidyverse code using non-standard evaluation.
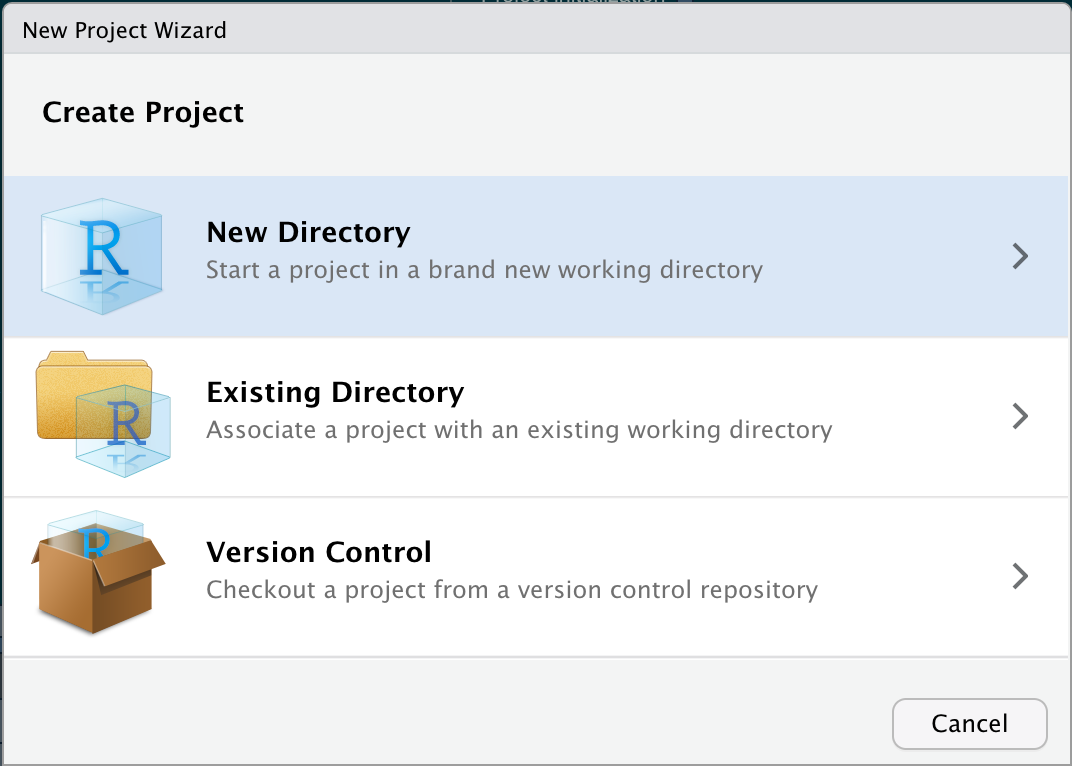
RStudio projects
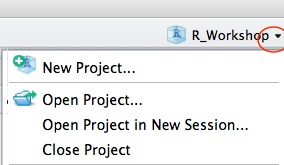
Creating a project
- Use the Project button in the top right corner
- Select
New project
- Name the project properly
- A
.Rprojextension file is generated.
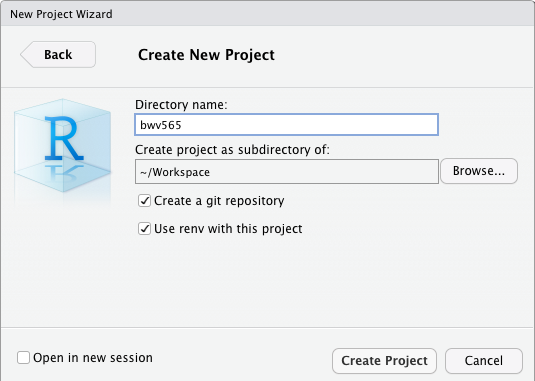
Project initialization from scratch
Good practice
Use git and renv when starting projects from scratch.
Your turn: Create a RStudio project
Use the Project button in the top right corner.
Always name the projects properly
Keeping names concise, no spaces
Once the project has been created, a
.Rprojextension file is generated. This allows for automatic working directory set-up.
Exercise
- You can create a new project called
dummy-project- in a new folder
- enable
git - enable
renv
- Create sub-folders
dataandR. - Standard practice is to include an
R/project for code, similar tosrcandbindirectories.
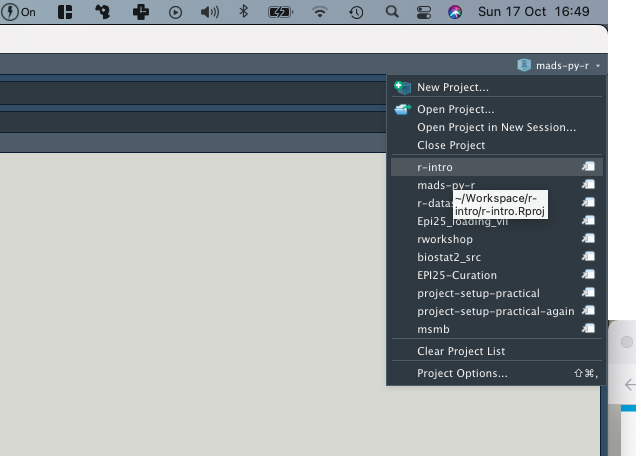
Learn to switch between projects
We will not use this directory in this course any more, hence the name.
Git in five minutes
![]()
What it does for you
- Version your code at small scale
- No more physical copies of source code(!)
- Go back to the versions that worked
- Go back to the version you used a year ago
- Helps to document your advancements and solutions
- Share and publish your code while continuing to work on it
├── analysis.R
├── analusis_2.R
├── analusis4.R
├── analusis_final.R
├── analysis.R
├── analusis-final2.R
└── alanusis_nature.R
└── analysis.R
Capacities in code versioning
- Register (
add) files in a project called arepository - Track changes (
commit) resolutions.) - Exchange code with others through a
shared repository - The most common platforms for sharing repositories are
- GitHub, a global platform owned and supported by Microsoft
gitlab, local platforms maintained and supported by institutes, e.g. gitlab.lcsb.uni.lu- Both platforms offer many other tools
- Here, we cover Git as far as easily accessible from RStudio and other IDEs
Project initialization from a repository
![]()
From an existing Git repository
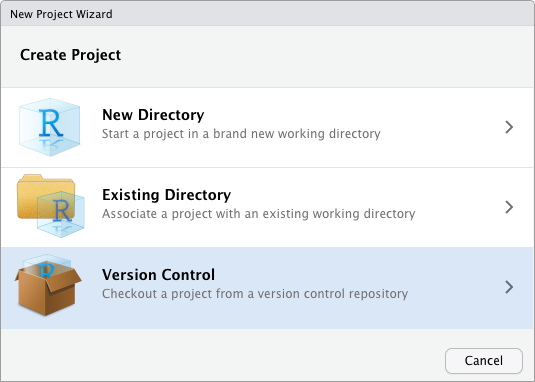
From a web repository by cloning (SSH)

Working with the repository
![]()
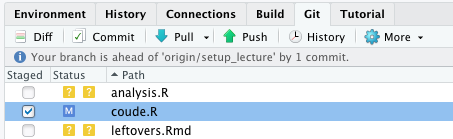
Add a file to the staging area
Using RStudio git panel:

The equivalent command line is git add coude.R
Commit (to) changes
![]()
After a change file is tagged with M (modified)
Click in the staged column to move the modification to the staged area.
- Changes you do not commit are not tracked.
- In
gityou can move between commits. - All these changes are local unless you declare a remote.
The command line equivalent is:
git commit -m "Added Chip-seq input analysis.R"
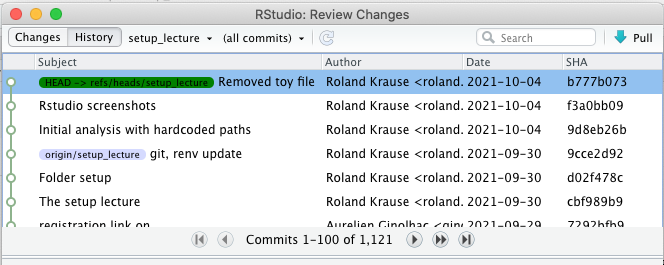
Git history
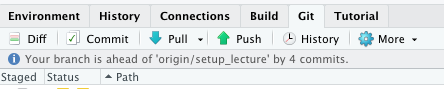
Synchronizing with a repository
![]()
Optionally use rebase (rewrite for linear history to avoid merge commits) using the little black arrow menu next to Pull
- Compare all files already in the remote repository
- Fail if changes are not committed
- If changes are committed.
- If additional changes have happened, ensure that code is working
Command line equivalents
- :
git pull - Pull with rebase:
git pull --rebase Pushthe local state to the remote repository
Command line equivalent of :
git push
What not to put into Git
![]()
Data types to be aware of
- Sensitive data (should not be on GitHub)
- Large data
- Git servers are not setup to handle large files (>1Mb)
- Binary data
- git makes line by line comparisons
- Derived data
- Any data you can reproduce by computation
- You might want to archive some intermediate files by other means
Possible solutions
- Install scripts
- Copy or link your data to the
datadirectory
- Copy or link your data to the
- git-lfs Large File Storage
- Put files on server but only tracks via checksums
- Repository only tracks a small text file instead
Make your life easy with .gitignore
![]()
- Derived files (e.g.
*.html) - Data products (
.RData)
.RData
**.Rproj
**.pdf
**.tex
.DS_Store
Standard .gitignore
The course practical contains a standard .gitignore file. Remember to take a look!
Let’s take a look at the .gitignore file in the practical
Working with Git
![]()
Helpful tips
Packages

Reliable: packages are checked during submission process
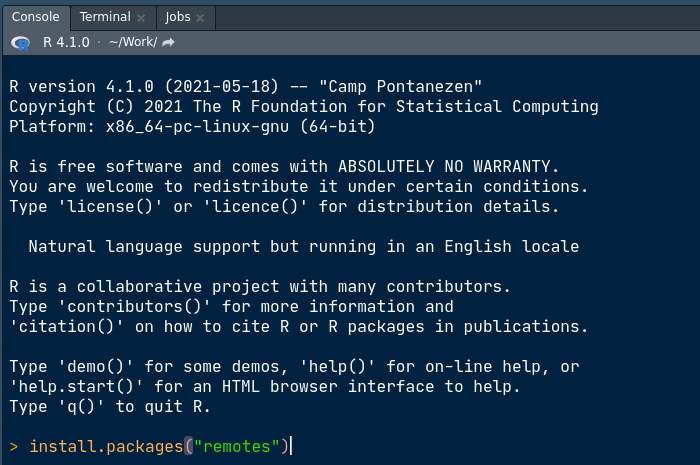
install.packages("tidyverse")Dedicated to biology research {limma} example
Requires dedicated package BiocManager for installation.
Typical install
# install.packages("BiocManager")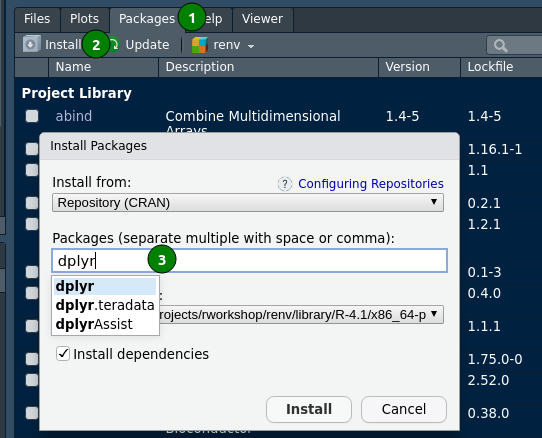
BiocManager::install("limma")Package installation
CRAN install from Rstudio (autocompletion)
CRAN install from Rstudio’s console
renv features
![]()
Basic functions
init()intializes your project and searches source code files for library callsdependencies()reads your calls
install(pkgs)installs packagepkgsincluding its dependenciessnapshot()registers changes, hashes and originrestore()to a certain point in time

GitHub classroom configuration
Check the github-classroom
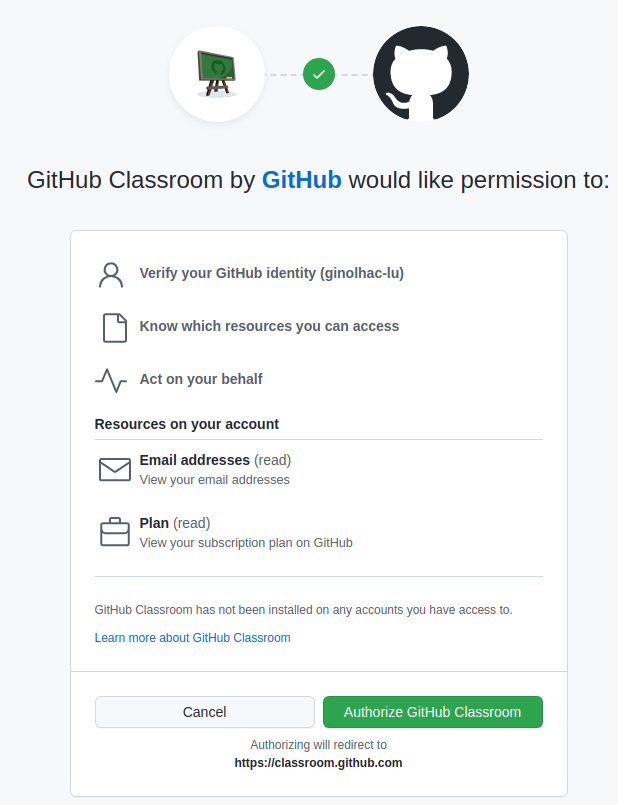
Follow this link and authorize it
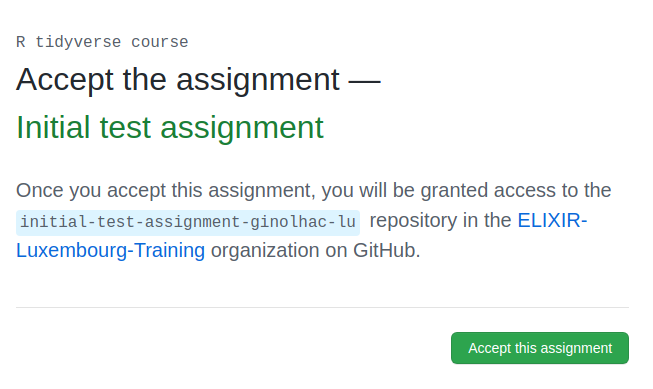
2. Accept the assignment
You should see this invite:
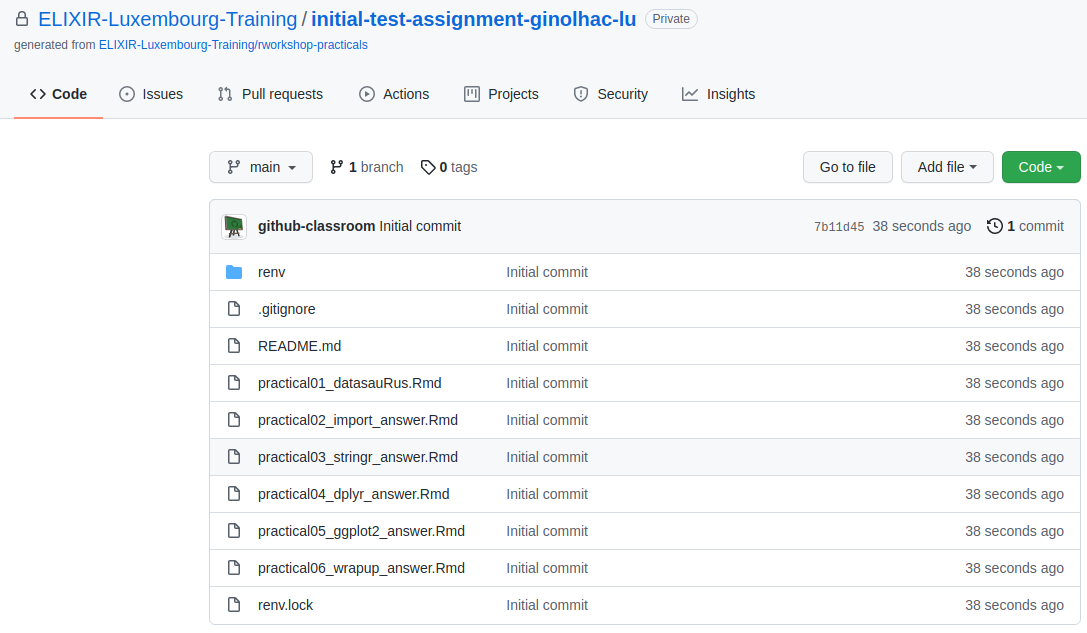
Check the repository
Go to the assignment
Reload the browser page
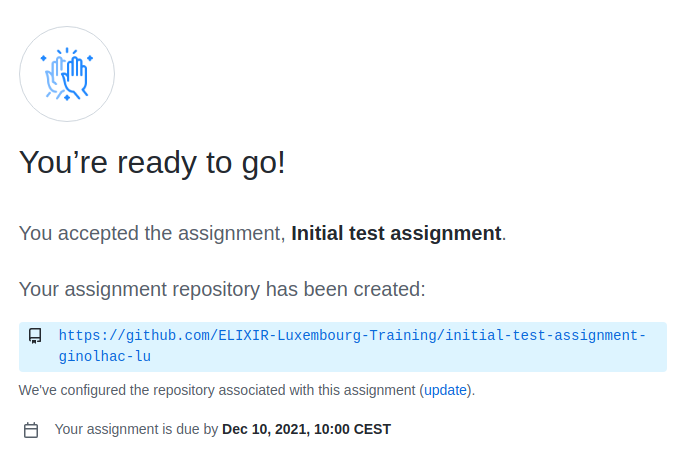
The assignment is created in your personal github repository.
![]()
Click on the link with the blue background
Check your own repo
It should look like this:
Copy the Code SSH URL
Make sure to use the Git Clone with SSH! 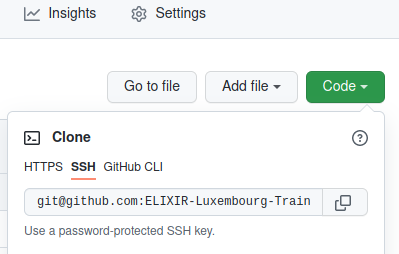
Clone the repository and complete the practical
Insert the URL for a new Git project
In Repository URL
Troubleshooting
Only if cloning in RStudio does not work, try to run the code below on the command line. You need to replace repo_url with the URL of your repository.
git clone _repo_url_